
Our First Quince Harvest
Hello friends,
We have finally have had our first quince harvest. We planted a quince Smyrna tree back in the winter of 2022, and we've been waiting impatiently for a harvest since then.
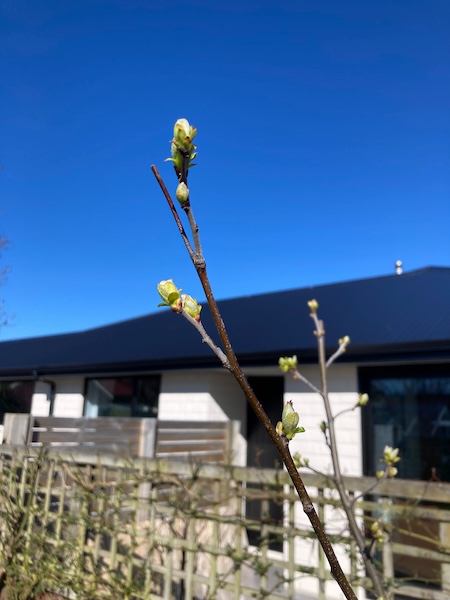
The first year after sitting there as a stick over winter, the leaves budded, and then it flowered. But nothing became of the fruit, and we weren't worried because the tree was too small to bear the big quince fruit anyway. Over the spring and summer it grew slowly, which was fine with us, as it needed to develop it's root system.
Winter came again, and once more it became a stick. And then the spring of 2023 the leaves unfurled, and the tree flowered again, but this time little quince fruit began to form. At the start there was about 10 fruit, but over the following weeks they started to drop off. Eventually 4 quince fruit remained.
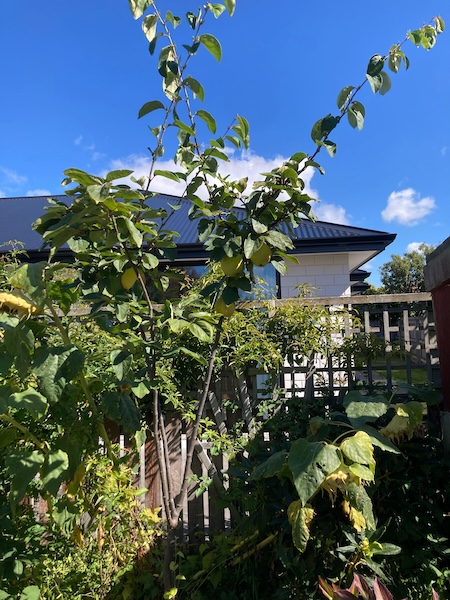
Over the spring and summer the fruit began to grow bigger on the tree. I was realistic in the fact that strong winds could knock them off, so I left them all there. By the time this autumn came, the 4 fruit remained, and they began to ripen to a pretty lemon colour.
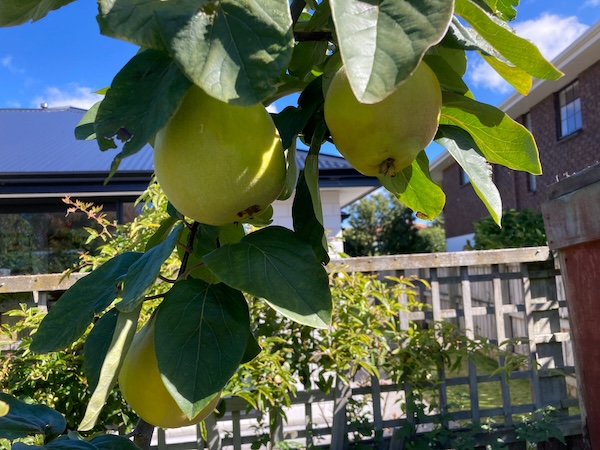
Ever since then we've been impatiently waiting for them to be ready to pick. I tested the fruit regularly to see if they were ready to harvest, by gently holding them and tipping them sideways. At first all four did not budge, so they were not ready. But then one day the two smallest fruit dropped into my hand when tested.
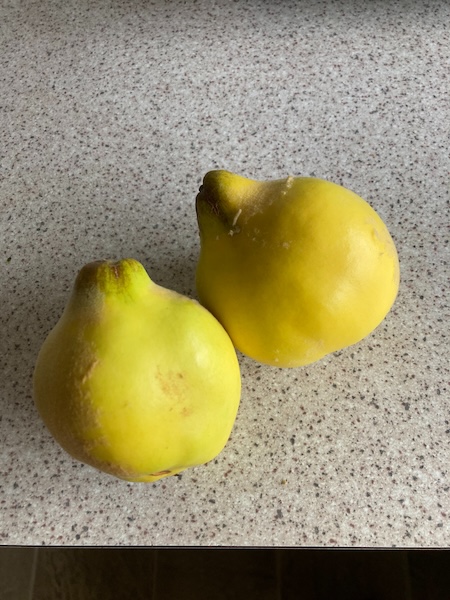
We had a couple of weeks more wait for the two biggest fruit to be ready to harvest. Luckily quince store well in the fridge, so when the last two quince were finally ready, it was time to poach the quince. We used our poached quince recipe, which you can find in a blog post here. This year we chose the vanilla and cinnamon combination for flavoring.
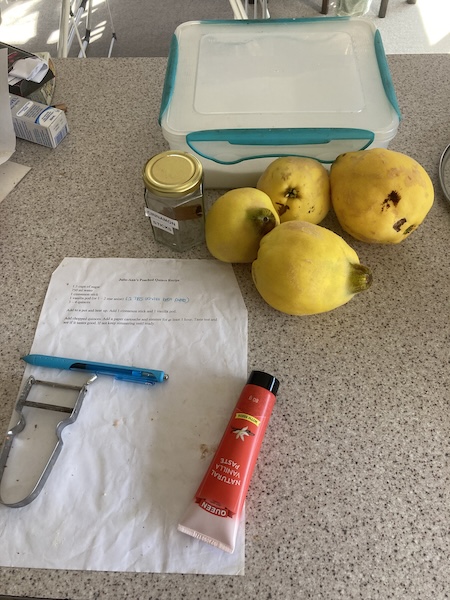
And the long wait for our own quince fruit was totally worth it, the poached fruit was aromatic and very tasty. And as a bonus we have lots in the freezer to enjoy over the year. And our quince tree is only a small tree, as it gets bigger much more fruit will ripen. My plan is to share them with family and friends and neighbours, and hopefully swapping them for other fruit we can't grow in the garden.
Have a wonderful day
Julie-Ann
Want to discuss my post? Feel free to chat with me on Instagram
or Mastodon or Bluesky.
Harvesting and Drying Alma Paprika
Hello friends,
This is our second year growing alma paprika plants. It's really satisfying to sow them as little tiny seeds, see them grow up into seedlings, and then onto big pepper plants with red peppers that you can dry into mild paprika.
The process for growing alma paprika plants is pretty much the same as any other capsicums or chillies. The seeds need to be sown in late winter, at the same time as tomatoes, and they need consistent steady heat in order to germinate. At that time of the year we have them sitting in the dining room where we have the fire going each day. Within a couple of weeks they germinate, and slowly over a couple of months they grow into seedlings which need to be potted on.
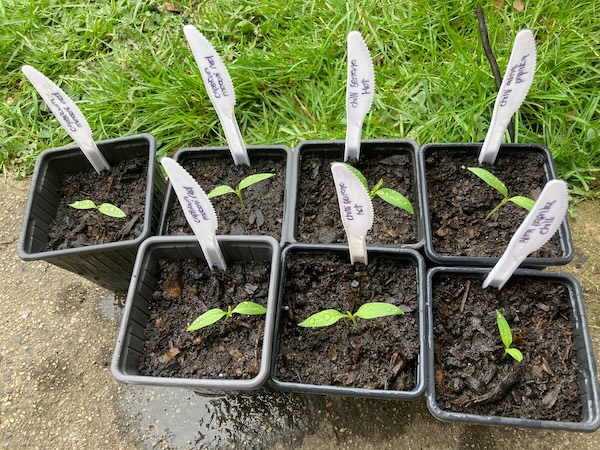
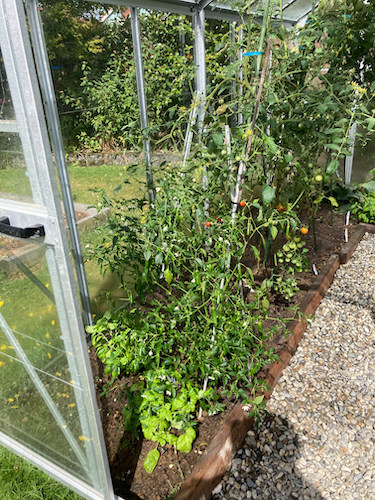
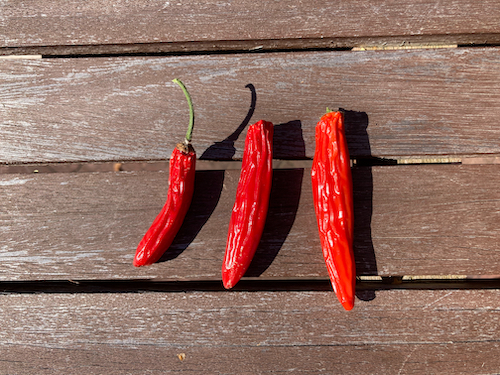
I move the alma paprika seedlings into the glasshouse in early October, and once it gets to Labour weekend, it's time to plant them into the ground in the glasshouse. Over the next few months they get bigger, and need staking, and at around Christmas they begin to flower. The rounded alma paprika fruits begin to grow, and then it's a wait over late summer and early autumn for the growing fruits to begin to change colour to a bright red hue.
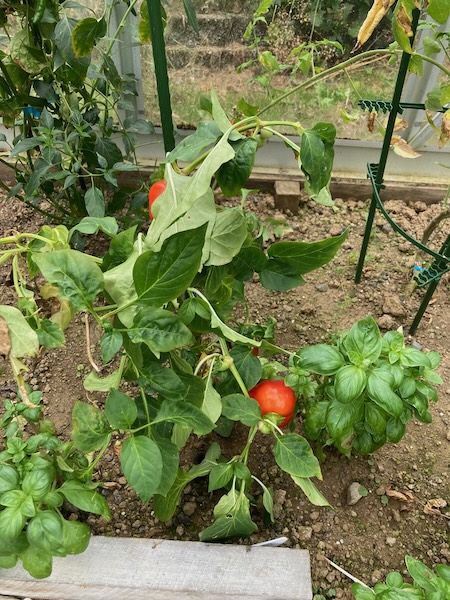
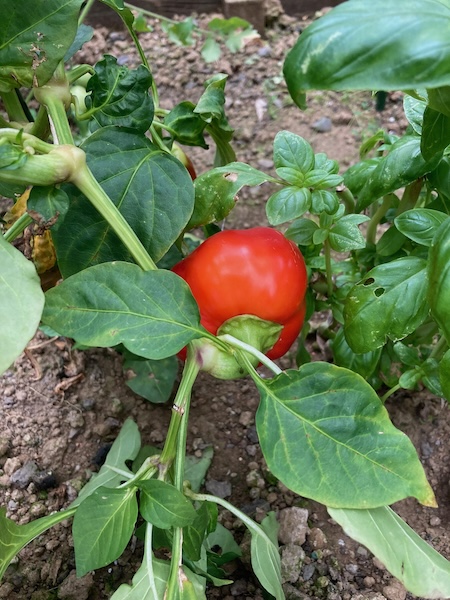
Once the alma paprika fruit has turned red, it's finally time to pick them. I cut them off the plant using a pair of secateurs, and then take them into the kitchen to begin processing them.
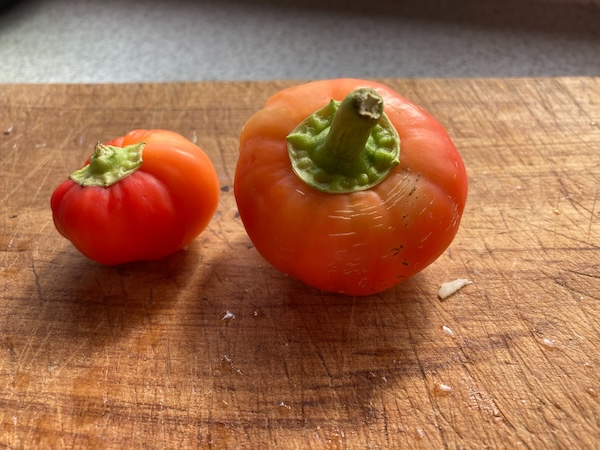
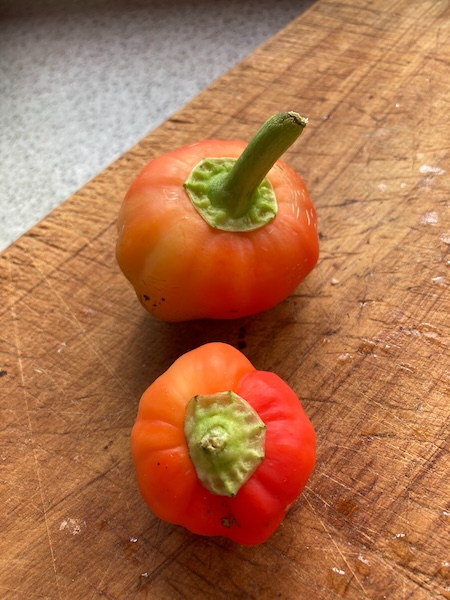
After chopping them in half, cutting off the stalks, and removing all the seeds, I slice the alma paprika fruit into thin slices and lay them out on a tray.
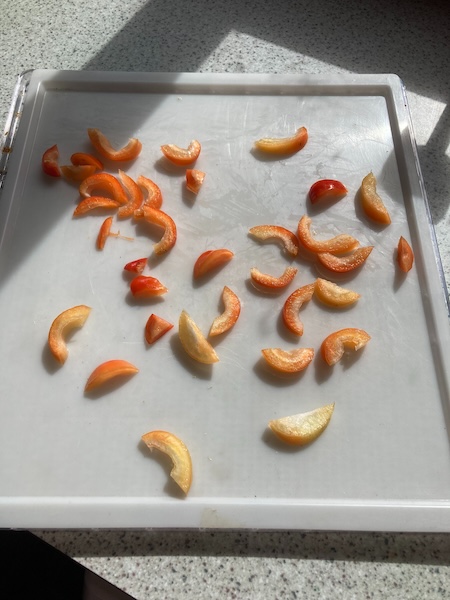
Then they go straight into the dehydrator at 35˚C, and I dry them until the slices are bone dry and brittle, ready for turning into paprika powder.
After a quick whizz in our spice grinder, the paprika powder is ready to use in cooking. The spice is tasty and mild, and works great in a number of dishes. The whole process is really easy, and satisfying, so it's now yet another yearly thing for me to do in the garden and kitchen.
Do you have any yearly tasks you enjoy? There's great satisfaction in accomplishing them when it means you have tasty food over the cold winter season.
Have a wonderful day
Julie-Ann
Want to discuss my post? Feel free to chat with me on Instagram or Mastodon or Bluesky.
Dehydrating All The Herbs
Hello friends,
It's finally the time of the year when the dehydrator is working full time, and there's currently a bunch of herbs drying in the dehydrator.
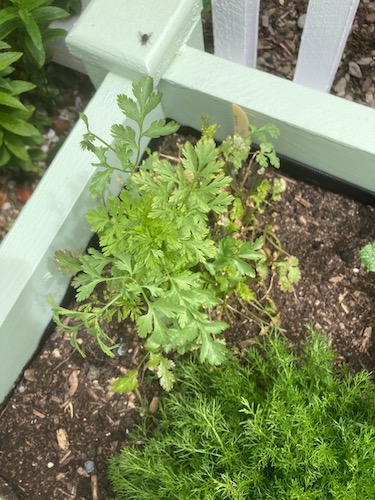
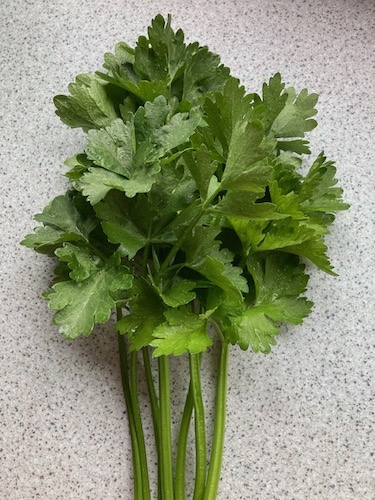
First up is coriander, which is currently on it's second harvest for the season.
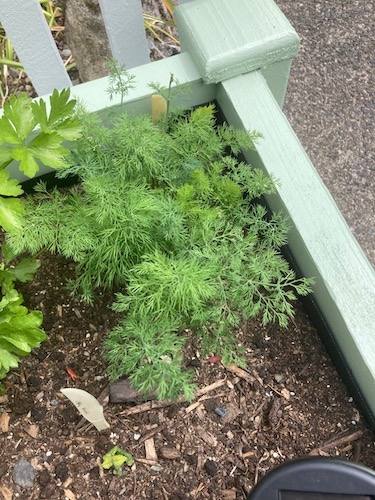
Next we have dill, which has also been harvested for the second time this season.
I've also just harvested celery for cutting for the first time this season, and I'm hoping to turn it into celery salt.
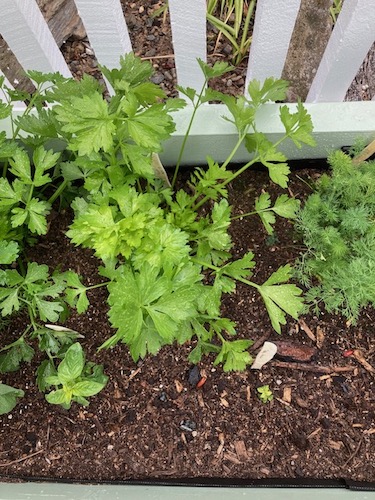
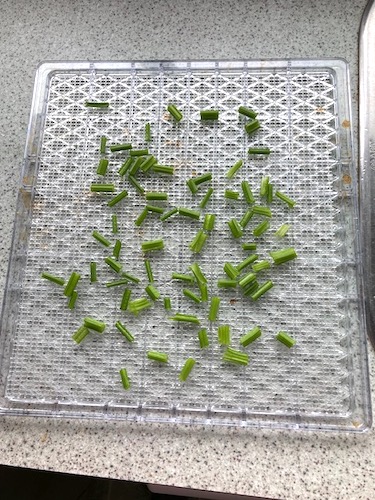
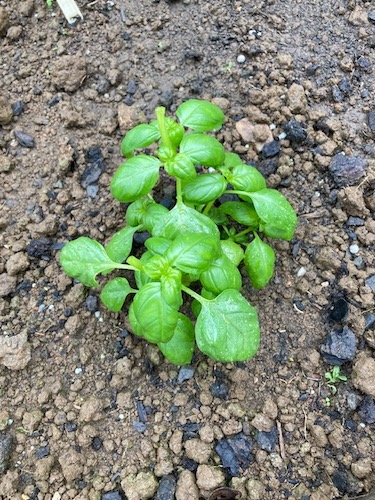
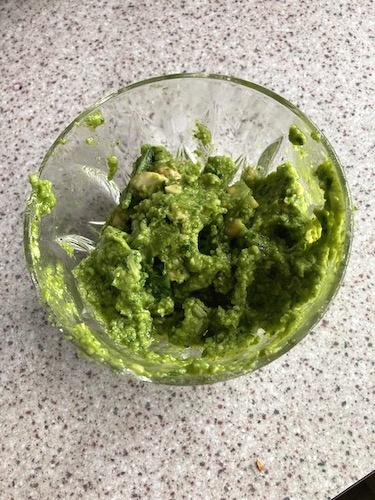
And also, there's finally enough basil to start dehydrating. I've just did the first harvest, and there was enough for both making a small amount of pesto, and also for some to dry.

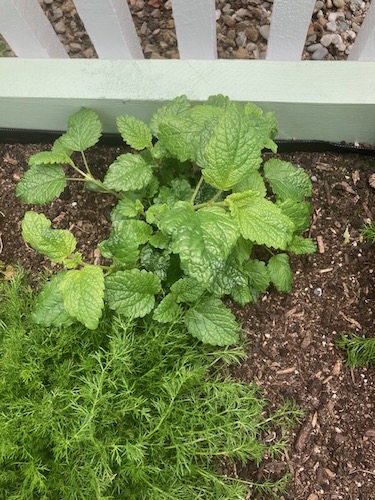
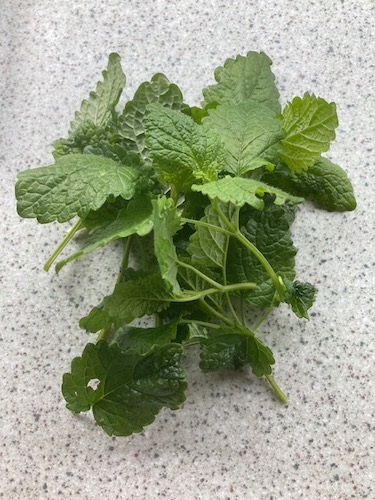
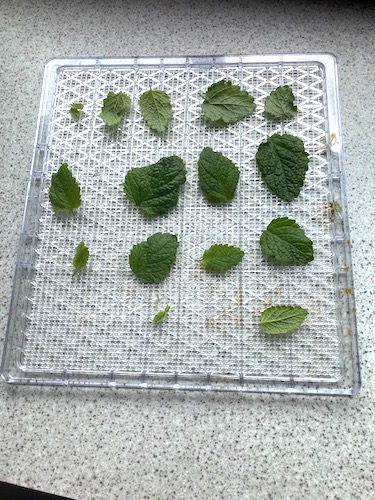
And finally, I've just harvested lemon balm for the first time ever. It's used a lot in the teas I often drink, so I'm hoping to make some for myself.
Have you got harvests coming on? I love early summer in the garden, it's full of so much potential.
Have a wonderful day.
Julie-Ann
Want to discuss my post? Feel free to chat with me on Instagram or Mastodon.
Drying and Grinding Our Homegrown Serrano Chillies
Hello friends,
During last year's growing season I had a Serrano chilli plant growing in our glasshouse, and over summer it gave me an abundant harvest of both green and red chillies. I picked so many chillies that I had no idea what to do with them all. I gave away as many as I could, and then with the rest I decided to dry them. We mainly use chillies as dried chilli powder in the kitchen throughout the year, so this method to prepare them was the best way to use all the left over chillies.
I waited until I had a big chlli harvest (some had already started drying out whole), and I cut off all the tops off before splitting them down the middle and removing the seeds (while wearing gloves). I then dried them in our dehydrator on trays at a temperature of 50˚C.
The smell was quite pungent, so initially the dehydrator was sitting outside under our veranda for the day, and then in the garage after that.
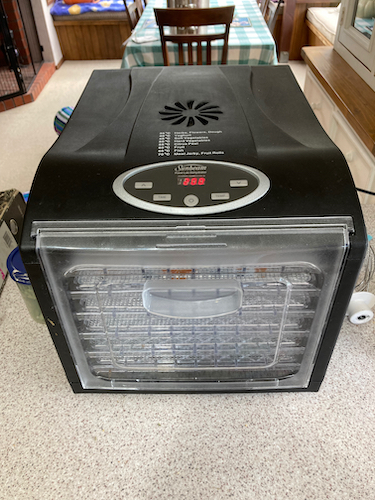
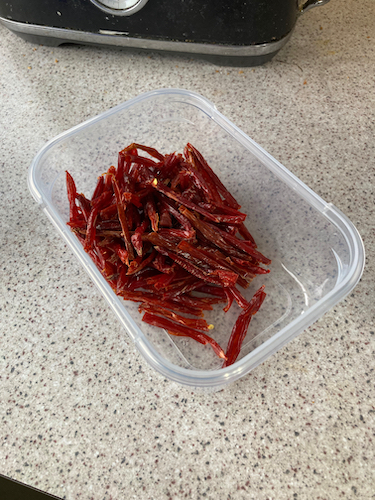
Once the chillies were dry, they were stored whole in a plastic container until it was time to grind them.
Last week, I finally got around to actually grinding them in our coffee and spice grinder. So as not to stink out the house with powdered chilli, I placed the grinder under the rangehood with it turned on.
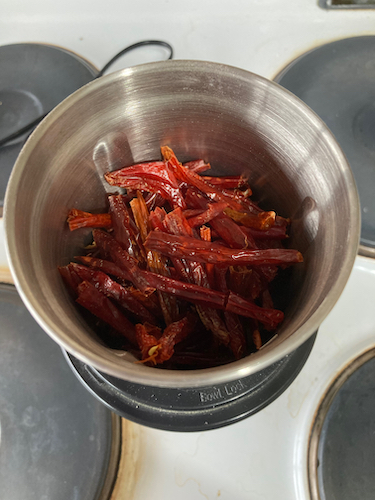
It didn't take very long to turn the chilli into powder. It didn't make as much as I thought it would, so I think that this year I won't give as much away, so we'll have more chilli powder for ourselves.

And we've already used our new chilli powder in a meal, we made chilli con carne that very night. It wasn't too spicy, but it had a really great flavor that we liked. I'm definitely happy to make even more chilli powder this coming growing season.
Have a wonderful day
Julie-Ann
Want to discuss my post? Feel free to chat with me on Instagram or Mastodon.
Processing Our Own Homegrown Wheat
Hello friends,
In an earlier blog post I shared with you how I grew wheat from seed last summer. In this blog post I share with you how I processed the wheat seeds, and turned it into flour.
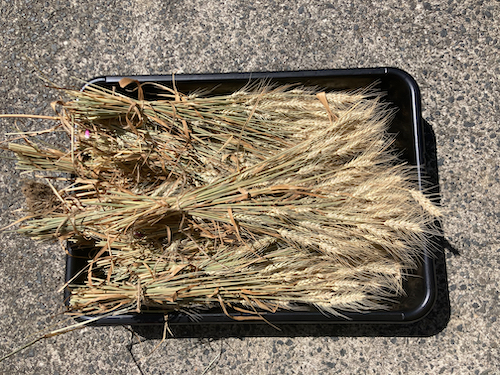
The first step in processing the dried wheat is threshing, whereby you loosen the wheat seeds from the attached straw and wheat head. After looking at a lot of videos on YouTube, we found two methods that would be relatively easy for a home grower to try.
The first method was pretty simple, basically it involved taking bunches of wheat and slapping it between the two sides of a bucket back and forth in a fast and furious manner. It sure made for a good arm workout.
The second method involved bashing the wheat head with a big stick, while not losing any of the wheat seeds in the process. We decided the easiest way for us to do this was to put the bunches of wheat into a fine pillow case, and bashing it with a flat piece of wood.
After experimenting to see how much the wheat seeds would loosen after using each threshing method, we decided that the best way forward would be to use both methods. I did the bucket method, and then passed what was left over to hubby for him to bash with a piece of wood.
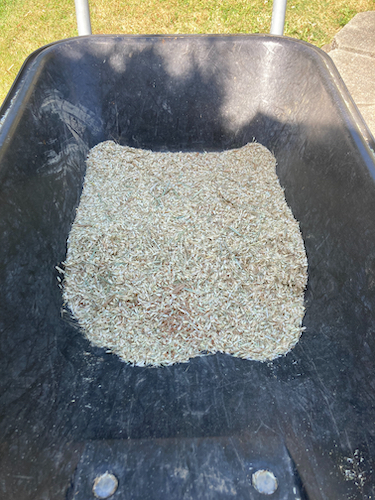
What you end up with is a mix of wheat seeds and chaff. WIth threshing done, it was onto the winnowing process to remove the wheat seeds from the chaff. After watching even more videos on YouTube, I decided that the easiest way to winnow the wheat was to wait for a super windy day, and then get the wind to blow the chaff away from the wheat as I dropped the mixture into a wheel barrow. I used a wheel barrow for this process because it gave me a big area to winnow in, and the high sides of the wheel barrow meant that seeds were less likely to blow away.
The trick I soon learnt was that there is a specific height you hand has to be at to remove the chaff without losing the wheat seeds over the edge in the process, and this was mainly dependent on how hard the wind is blowing. If the wind is very strong, it's best to keep your hand close to the wheel barrow, and if the wind was light you could raise your hand higher. Also another thing to note, is that the wheat chaff is very dry and sharp and pointy, and it hurts your fingers, so wearing gloves is a must. The winnowing step was the most time intensive step, and I had to repeat the winnowing multiple times to get rid of most of the chaff from the wheat seeds.
WIth the main winnowing step complete, we then by hand had to pick out any stray bits of chaff from the wheat, along with any other random bits of stuff that had made it through the previous steps, and this also took a while, but it was made easier by watching TV while we did so.
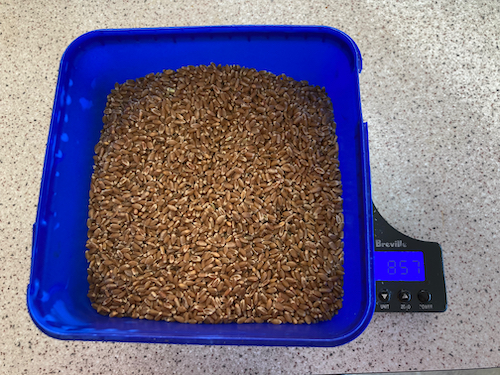
Finally after all those steps, all we had left was wheat seeds, and in particular 857 grams of homegrown wheat seeds. Getting to this stage was quite a feat in itself, but we hadn't even gotten to the milling stage yet. So it was back to the internet and in particular YouTube to see how we could mill the wheat into a fine enough grade for making bread...
The following methods suggested to mill the grain into flour did not work for us:
1 - Using a mortar and pestle - Didn't do anything at all, a complete waste of time.
2 - Using our coffee and spice grinder - It did chop the grains into a couple of pieces each, but did not mill it at all
3 - Using our food processor - Didn't do much better than the coffee and spice grinder.
This was all pretty frustrating, but the good thing about wheat seeds is that they can store for over a year as is in a sealed container at room temperature (much longer than flour can), so we left it while we pondered what we could do. Hubby and I finally came to the conclusion that the only way forward would be to buy a mill of our own. There are a lot of options in New Zealand to buy stand alone home mills, but most were super expensive, and were much bigger and stronger than what we needed.
But then, while perusing the Flour Power Mills website, we found a small stone mill that would attach to our KitchenAId stand mixer. The Mockmill Stone Mill attachment was at least half the price of the smallest stand alone mills available, and as a bonus it would also mill a wide range of other grains and legumes (including amanath, chia seeds, oats, millet, chickpeas, maize, barley, dried rice, quinoa, rye, and dried soya beans), as well as milling a whole bunch of herb and spice seeds...
It wasn't too long before the Mockmill Stone Mill had arrived by courier, and hubby attached it to our KitchenAid stand mixer.
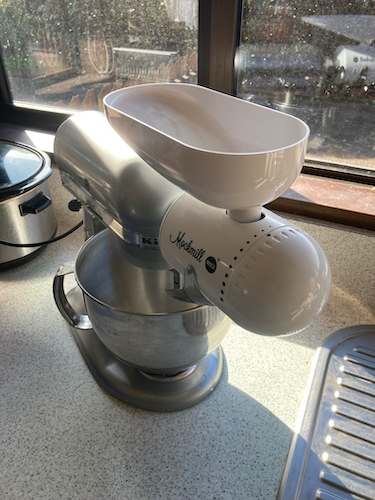
The set up was pretty easy, and all we had to do was set the mill to a fine setting, and then put the wheat seeds in the hopper. We turned the stand mixer on, and fine flour began pouring out of the flour chute.
The process was loud, but very easy, and within 5 minutes we had our own flour! We hadn't lost any wheat in the process, and the flour the mill had produced on the finest setting was just as good as flour we used normally for making our own bread.
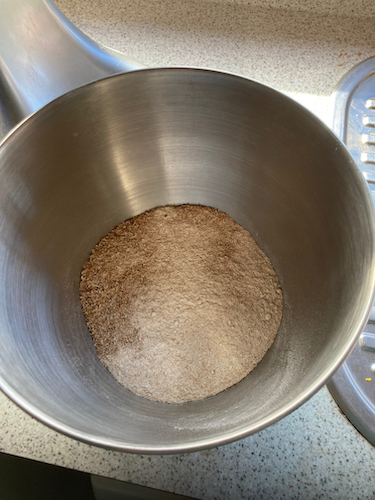
The wheat in this state is a mixture of fine white flour and wheat bran flakes. For a rustic bread it's fine to use as is, or you can sieve the flour to remove the wheat bran if needed. The only step left in this journey is to make bread with the flour, in a future blog post I'll share with you hubby's family famous bread recipe that never fails, using our own homegrown flour!
We are very excited about this, but not only that, hubby has already started mumbling about growing our own maize, so that we can make our own corn chips...
Have a wonderful day
Julie-Ann
Want to discuss my post? Feel free to chat with me on Instagram or Mastodon.
Social Media


Archives